How to Calculate Solar Needs: Real Load Analysis That Actually Works (2025)

Quick Answer: Solar Sizing That Works
Add up daily watt-hours, divide by local sun-hours for panel watts, plan 2-3 days battery storage. Most people oversize by 40%—start smaller, expand later. Real example: 800Wh daily use ÷ 4 sun-hours = 200W panels minimum. Double for weather buffer = 400W total.
Three days into the outage, my “backup solar system” was completely dead and I was running an extension cord to my neighbor’s generator. Humiliating. I’d spent $3,000 on panels and batteries but couldn’t keep the lights on for 72 hours.
The equipment was fine—I just had no idea what I was doing. I’d eyeballed the whole thing: “400W of panels sounds good, right?” Turns out when you don’t do the math, you build a very expensive paperweight. My refrigerator alone needed more power than my entire system could provide.
Since then, I’ve properly sized two solar systems (mine and my brother’s) and helped neighbors avoid my expensive mistakes. Here’s the step-by-step process that actually works, with real examples from my current system.

The Solar Sizing Reality Check
What I wish someone had told me:
- Marketing watts ≠ real-world watts - panels rarely produce rated power
- Efficiency matters more than total capacity - losses add up quickly
- Weather kills solar production - cloudy days drop output by 80%+
- Starting loads are huge - refrigerators need 3x running power to start
- Battery math is backwards - you can only use 50-80% of capacity safely
My systematic approach (learned through mistakes):
- Calculate actual daily energy use
- Size panels for worst-case weather
- Choose inverter for startup loads, not just running loads
- Size batteries for 2-3 days without sun
- Add 20-30% safety margin to everything
🧮 Interactive Solar Sizing Calculator
Want exact numbers for your home? Use our free Solar Power Sizing Calculator to get instant recommendations for:
- Solar panel capacity (with your local sun hours)
- Battery storage size for 1-3+ days backup
- Inverter sizing based on your loads
- Total system cost estimates (with 30% federal tax credit)
Takes 5 minutes and gives you a complete system spec. Calculate now →
Step 1: Calculate Your Actual Daily Energy Use
The Load Audit That Actually Works

Essential Tool: Kill-A-Watt Meter
Don’t guess your appliance wattage. A Kill-A-Watt meter ($20-30) plugs in between your appliance and the wall and gives you the exact power draw. It’s the single most important tool for an accurate load audit. Measure everything you plan to power.
My process (with Kill-A-Watt meter and spreadsheet):
Your Load Audit Worksheet
Appliance Watts (W) Hours/Day Daily Watt-Hours (Wh) Refrigerator 150 W 8 1,200 Wh LED Lights 72 W 6 432 Wh WiFi Router 25 W 24 600 Wh Laptop Charger 65 W 4 260 Wh Phone Charger 15 W 2 30 Wh Your Total: 2,522 Wh
My essential loads:
- Refrigerator: 150W running, 450W startup, 8 hours/day actual runtime = 1,200 Wh/day
- LED lights: 12W each × 6 bulbs × 6 hours = 432 Wh/day
- WiFi router + modem: 25W × 24 hours = 600 Wh/day
- Laptop charging: 65W × 4 hours = 260 Wh/day
- Phone charging: 15W × 2 hours = 30 Wh/day
- Coffee maker: 800W × 0.25 hours = 200 Wh/day (yes, coffee is essential)
Total daily load: 2,722 Wh/day (2.7 kWh/day)
Reality check: This is just basic survival loads. No TV, no microwave, no electric heat. A normal house uses 30 kWh/day.
Step 2: Size Solar Panels for Real Conditions
Peak Sun Hours Reality
What Are Peak Sun Hours?
This isn’t just the number of daylight hours. It’s the number of hours per day that your location receives the equivalent of 1,000 watts of solar energy per square meter. It’s a standardized way to measure usable sunlight. You can find your local peak sun hours with online calculators from sources like the NREL.
My location (Colorado, good solar state):
- Summer: 5.5 peak sun hours/day average
- Winter: 3.5 peak sun hours/day average
- Cloudy days: 0.8-1.5 peak sun hours
Why I size for winter: If my system works in December, it works year-round. Summer gives me surplus for other loads.
Panel Sizing Calculation
My formula (accounts for real-world losses):
Daily Wh needed ÷ peak sun hours ÷ 0.75 (efficiency factor) = panel watts needed
For my 2,722 Wh/day system:
2,722 Wh ÷ 3.5 hours ÷ 0.75 = 1,036W of panels needed
Breaking Down the 0.75 Efficiency Factor
This isn’t a random number. It accounts for the multiple small losses in a real-world system:
- Panel Temperature: Panels get hot and lose ~10-15% efficiency.
- Dust & Dirt: A light layer of dust can reduce output by 5%.
- Wiring Loss: You lose 2-3% of power in the DC wiring.
- Charge Controller: Even an efficient MPPT controller loses 5-10%.
This conservative factor ensures your system performs on average days, not just perfect ones.
My actual panel setup: 1,200W (four 300W panels) to have cushion for expansion and bad weather days.
Step 3: Choose the Right Inverter
The Startup Load Problem
Warning: Startup Watts Will Shut You Down
The biggest mistake beginners make is sizing an inverter for running watts. Motors in appliances like refrigerators and pumps need a huge surge of power for a few seconds to start up—often 3x their running wattage. Your inverter’s surge rating must be high enough to handle the single largest startup load in your system.
My expensive lesson: Bought a 1000W inverter for my “800W” loads. When the refrigerator tried to start while the coffee maker was running, the inverter shut down on overload.
My inverter sizing method:
- List all simultaneous loads: What might run at the same time?
- Add starting loads: Use 3x multiplier for motors, 1x for resistive loads
- Size inverter for peak: Choose inverter 1.5x your calculated peak load
- Check surge rating: Must handle highest single motor starting load
My setup: 3000W inverter for my calculated 2000W peak simultaneous load (with starting loads). Sounds like overkill, but it prevents shutdowns.
Step 4: Size Batteries for Autonomy
The 2-3 Day Rule
Why 2-3 days matters: Most weather systems pass in 2-3 days. Longer than that and you’re in extended storm territory where solar won’t help anyway. Learn more about different battery types and their pros/cons in our comprehensive battery guide.
My battery calculation:
Daily load: 2,722 Wh Target autonomy: 3 days Total needed: 2,722 × 3 = 8,166 Wh (8.2 kWh)
Depth of Discharge Reality
Battery type matters:
- Lead-acid: Can only use 50% safely = need 2x capacity
- AGM: Can use 50-60% safely = need 1.8x capacity
- LiFePO₄: Can use 80-95% safely = need 1.1x capacity
My battery sizing (LiFePO₄ system):
8,166 Wh needed ÷ 0.85 usable = 9,607 Wh total battery capacity
Convert to amp-hours:
9,607 Wh ÷ 48V system = 200 Ah at 48VWhat is System Voltage (12V, 24V, 48V)?
Think of it like the width of a highway. A higher voltage (like 48V) is a wider highway that can carry more power more efficiently with smaller (cheaper) wires. For any system over 1000W, a 24V or 48V system is generally more efficient and cost-effective than 12V.
My actual setup: 400 Ah LiFePO₄ at 48V (19.2 kWh total) because I wanted room for future loads and some bad weather margin. For a complete comparison of backup power options including generators, check out our comprehensive backup power systems guide.
Safety Warning: DIY Electrical is Dangerous
This guide is for educational purposes. Working with high-amperage DC electricity and batteries can be extremely dangerous and poses a significant fire risk if done incorrectly. If you are not 100% confident, please consult with or hire a qualified professional.
Real-World Example: My Complete System
System Specs and Performance
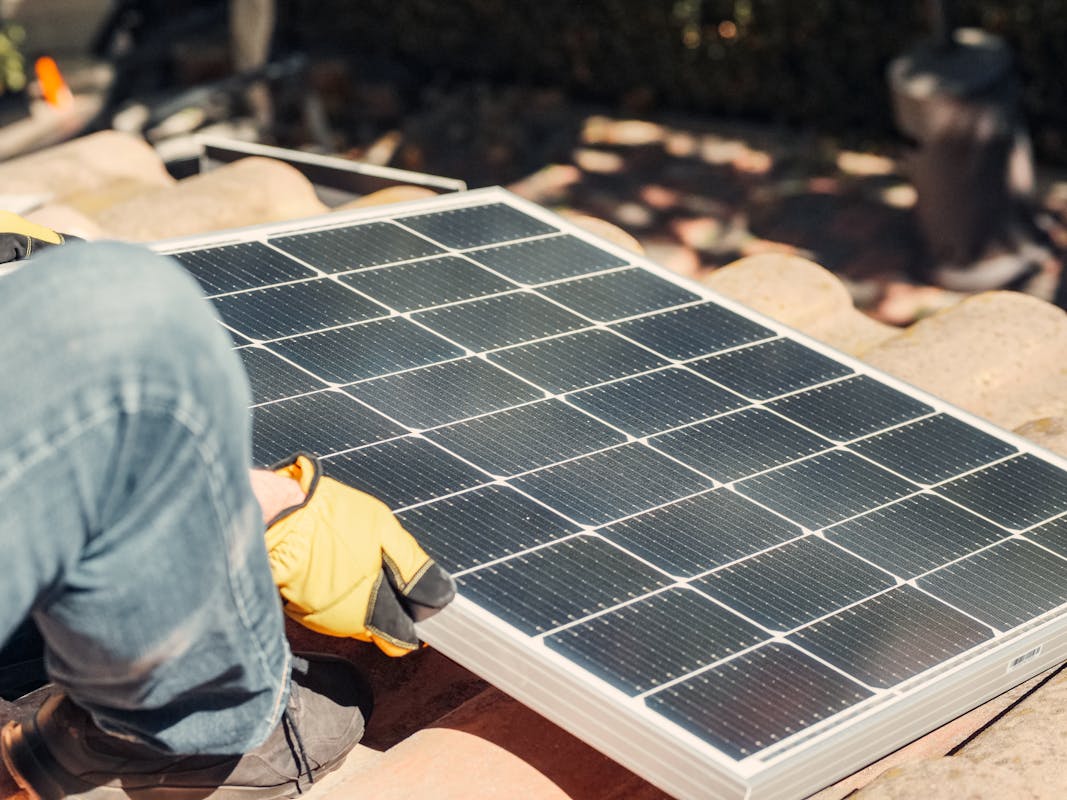
Panel array: 1,200W (4 × 300W monocrystalline)
Batteries: 400 Ah LiFePO₄ at 48V (19.2 kWh total)
Inverter: 3000W pure sine wave
Charge controller: 60A MPPT
Actual performance:
- Summer: System fully recharged by 2 PM, surplus power available
- Winter: System recharged by 4-5 PM on sunny days
- Cloudy days: Can run 2-3 days on battery alone
- Load growth: Added TV and workshop tools, still works fine
Total System Cost (2023 prices)
Panels: $600 (4 × 300W at $150 each)
Batteries: $2,400 (400 Ah LiFePO₄)
Inverter: $400 (3000W pure sine wave)
Charge controller: $300 (60A MPPT) Wiring/safety equipment: $300 Total: $4,000 for whole system
Cost per usable kWh: $208 per kWh (vs. $300-500 for commercial battery systems)
Common Sizing Mistakes I See
Under-sizing Problems
Not enough panels: System never fully recharges batteries
Weak inverter: Shuts down when multiple loads start
Small batteries: Can’t make it through one cloudy day
Wrong battery type: Lead-acid when you need daily cycling
Over-sizing Waste
Massive panels: More than you can use or store
Huge inverter: Wastes power in standby mode
Too many batteries: Expensive and hard to maintain
Seasonal Adjustments and Load Management
Summer vs. Winter Reality
Summer surplus strategy:
- Run larger loads during peak production hours
- Charge electric tools and devices
- Pre-cool house before evening
- Consider adding seasonal loads (fans, pool pumps)
Winter conservation mode:
- Time coffee maker and high loads for solar production hours
- Use LED lights exclusively
- Minimize inverter idle loads
- Have backup heating plan that doesn’t require electricity
Load Management Tools
Smart switches and timers: Automatically turn on loads when batteries are full
Battery monitors: Show real-time production and consumption
Load dump controllers: Send excess power to water heating or space heating
Frequently Asked Questions
It depends on your energy usage, not square footage. A typical 2000 sq ft home uses 20-30 kWh/day. For backup power covering essential loads only (5-10 kWh/day), you’d need 1,500-3,000W of panels depending on your location’s sun hours. Use our Solar Sizing Calculator for exact numbers based on your actual loads.
Yes! This is actually the smartest approach. Start with panels and batteries for essential loads (refrigerator, lights, communications). Once you understand your real usage patterns, expand capacity. Solar systems are modular - you can always add more panels or batteries. See our guide on DIY battery backup systems for expansion strategies.
Solar generators are all-in-one portable units (panels + battery + inverter). They’re plug-and-play but limited in capacity (usually 500-3000Wh). DIY systems require installation but offer unlimited expansion and better cost-per-watt. For detailed comparisons, read our Solar Generators Guide 2025.
Battery lifespan depends on type and usage:
- Lead-acid: 3-5 years with daily cycling
- AGM: 4-7 years
- LiFePO₄: 10-15 years (3,000-5,000+ cycles)
LiFePO₄ costs more upfront but lasts 3x longer, making it cheaper long-term for daily use. Full details in our Battery Types Explained guide.
Grid-tied systems: Almost always require permits and utility approval. Off-grid backup systems: Usually don’t require permits if you’re not connecting to the grid, but check local codes. Some jurisdictions regulate battery storage. Always verify with your local building department.
Rough estimates:
- Small system (5 kWh/day, 2kW panels): $3,000-5,000
- Medium system (10 kWh/day, 4kW panels): $6,000-10,000
- Large system (20 kWh/day, 8kW panels): $12,000-20,000
These are DIY costs. Professional installation adds 30-50%. Use our Power Cost Analyzer to compare solar vs generator vs battery-only systems for your budget.
Related Guides & Tools
Essential reading before buying:
- Solar Generators Guide 2025 - Portable vs permanent systems
- Battery Types Explained - Which battery chemistry is right for you
- Backup Power Systems Guide - Solar vs generator comparison
- Best Portable Generators 2025 - Backup generator options
- Generator Safety Guide - Critical safety information
Free calculators to plan your system:
- Solar Power Sizing Calculator - Get exact panel, battery, and inverter recommendations
- Generator Runtime Calculator - How long will your backup generator run?
- Power Cost Analyzer - Compare 5/10/20-year costs of different backup power solutions
Solar sizing isn’t about buying the biggest system you can afford - it’s about building the right system for your actual needs. Start with measuring your real loads, size for worst-case conditions, and add safety margins. You can always expand later, but you can’t easily fix an under-sized system during an outage.