DIY Emergency Food Preservation: Dehydrating, Canning & Home Preservation Methods
Seasonal Content: This guide is most relevant during fall months.
DIY Emergency Food Preservation: Dehydrating, Canning & Home Preservation Methods
By Alex Morgan - Licensed Emergency Manager with 12+ years testing emergency food preservation systems
The Strategic Value of Home Food Preservation

I’ll be honest—I used to think home food preservation was just for homesteaders and people with way too much time on their hands. Then the 2021 supply chain chaos hit, and I watched grocery store shelves empty while my neighbor calmly pulled jars of home-preserved tomatoes from her basement. That wake-up call changed everything.
After 12 years working in emergency management and testing pretty much every preservation method you can imagine, I’ve learned something crucial: DIY preservation isn’t about going full homesteader. It’s about filling the gaps that even the best commercial emergency foods can’t touch.
Here’s what really got my attention: Commercial emergency food runs $8-15 per serving. Home-preserved? $0.50-2.00. During those 2021 supply chain disruptions, families who knew how to preserve food maintained their normal diet while everyone else fought over the last can of green beans.
And yes, FEMA emergency protocols actually recognize home food preservation as a critical skill—communities that preserve food recover faster from disasters and eat better doing it.
🥫 Integrated Approach: Home preservation complements our Emergency Food & Water Storage system. Combine preserved foods with bulk storage methods for comprehensive food security. Why preserve food at home:
- Cost efficiency: $2-3 per serving commercial vs $0.50-1.00 home preserved
- Nutritional control: Fresh preservation retains more nutrients than processed alternatives
- Dietary customization: Accommodate allergies, preferences, and special needs
- Psychological comfort: Familiar tastes during stressful emergency situations
- Skill resilience: Ability to preserve fresh foods during extended disruptions
Real-World Application
During the 2021 Texas freeze, families with home-preserved foods maintained better nutrition and morale than those relying solely on commercial emergency supplies. My neighbor’s dehydrated garden vegetables provided essential vitamins and familiar flavors when fresh produce became unavailable for weeks.
Food Dehydration: The Foundation Method
Why Dehydration Works for Emergency Preparedness
Preservation principles:
- Moisture removal: Reduces water activity below levels supporting bacterial growth
- Nutrient retention: Preserves 80-90% of vitamins and minerals
- Weight reduction: 90% weight reduction for easier storage and transport
- No power dependency: Once dried, requires no electricity for storage
- Long shelf life: 1-10 years depending on food type and storage method Equipment options by budget and scale:
Basic level ($50-100):
- Oven drying: Use existing kitchen equipment with minor modifications, prop door open for ventilation
- Air drying: Traditional methods for herbs, peppers, certain vegetables in dry climates
- Screen drying: Simple frames for small-scale fruit and vegetable drying, 2-4 week payback period
Intermediate level ($100-300):
- Electric dehydrators: Excalibur, Nesco brands for consistent results, 6-month ROI with regular use
- Stack vs shelf design: Shelf-style preferred for even drying and easier loading
- Temperature control: Essential for proper nutrition retention, prevents over-drying
Advanced level ($300-1000+):
- Commercial-grade units: High-capacity for large-scale preservation, suitable for community groups
- Freeze dryers: Optimal nutrition retention, 25-30 year storage life, $2000+ investment
- Solar dehydrators: Off-grid capability, sustainable operation, DIY construction possible
Real talk from my testing: If you can swing the $150-200 for an intermediate dehydrator, do it. I tried the oven method first (because I’m cheap), spent three weekends babysitting apple slices, and ended up with half of them over-dried and the other half starting to mold. A decent electric dehydrator paid for itself in about 6 months just from the food I didn’t ruin.
Dehydrating Specific Food Categories

Fruits (high-acid, easier preservation): Apples:
- Preparation: Core, slice 1/4 inch thick, treat with lemon juice
- Drying time: 8-12 hours at 135°F
- Storage life: 1-2 years in airtight containers
- Rehydration: Excellent for cooking, acceptable for snacking
- Emergency value: Natural sugars, fiber, familiar comfort food Berries:
- Preparation: Whole for small berries, halved for larger
- Pre-treatment: Brief steam blanch for tough skins
- Drying time: 10-15 hours at 135°F
- Storage advantage: Concentrated nutrition, high antioxidants
- Uses: Trail mix, oatmeal addition, direct snacking Bananas:
- Selection: Ripe but firm, avoid overripe
- Preparation: 1/4 inch slices, optional lemon juice treatment
- Drying time: 6-10 hours at 135°F
- Nutritional benefit: Potassium, natural sugars, energy density
- Storage: 6-12 months, tends to darken over time Vegetables (require careful handling): Tomatoes:
- Variety selection: Paste tomatoes (Roma) work best
- Preparation: Quarter lengthwise, remove seeds and gel
- Drying time: 8-15 hours at 135°F
- Storage life: 1-2 years properly stored
- Rehydration: Excellent for soups, sauces, stews Peppers:
- Hot peppers: Excellent candidates, naturally low moisture
- Sweet peppers: Remove seeds, cut in strips
- Drying time: 6-12 hours depending on thickness
- Storage advantage: Concentrated flavor, small storage space
- Safety note: Use gloves, ensure adequate ventilation for hot varieties Onions:
- Preparation: 1/4 inch slices, separate rings
- Drying challenge: High moisture content, strong odor
- Storage benefit: Essential flavoring, compact storage
- Rehydration: Works well in cooked dishes Proteins (advanced techniques): Jerky (meat and fish):
- Meat selection: Lean cuts, remove all visible fat
- Preparation: 1/4 inch strips, against the grain
- Marinade: Salt-based with herbs/spices for flavor and preservation
- Drying time: 4-8 hours at 155°F
- Safety critical: Internal temperature 160°F for safety
- Storage: 6-12 months vacuum sealed
Dehydration Safety and Quality
Food safety requirements:
- Temperature monitoring: Accurate thermometer essential
- Proper drying: Foods should be crisp or leathery, no moisture pockets
- Contamination prevention: Clean equipment, sanitary handling
- pH considerations: High-acid foods safer than low-acid Quality preservation techniques:
- Pre-treatment options: Lemon juice, ascorbic acid, steam blanching
- Even drying: Rotate trays, maintain consistent spacing
- Proper storage: Airtight containers, moisture absorbers, cool storage
- Quality testing: Check stored foods regularly for signs of deterioration Common dehydration mistakes:
- Over-drying: Creates poor texture, nutrient loss
- Under-drying: Allows spoilage, shortened storage life
- Uneven pieces: Inconsistent drying, some pieces spoil while others over-dry
- Poor storage: Allows moisture reabsorption, pest contamination
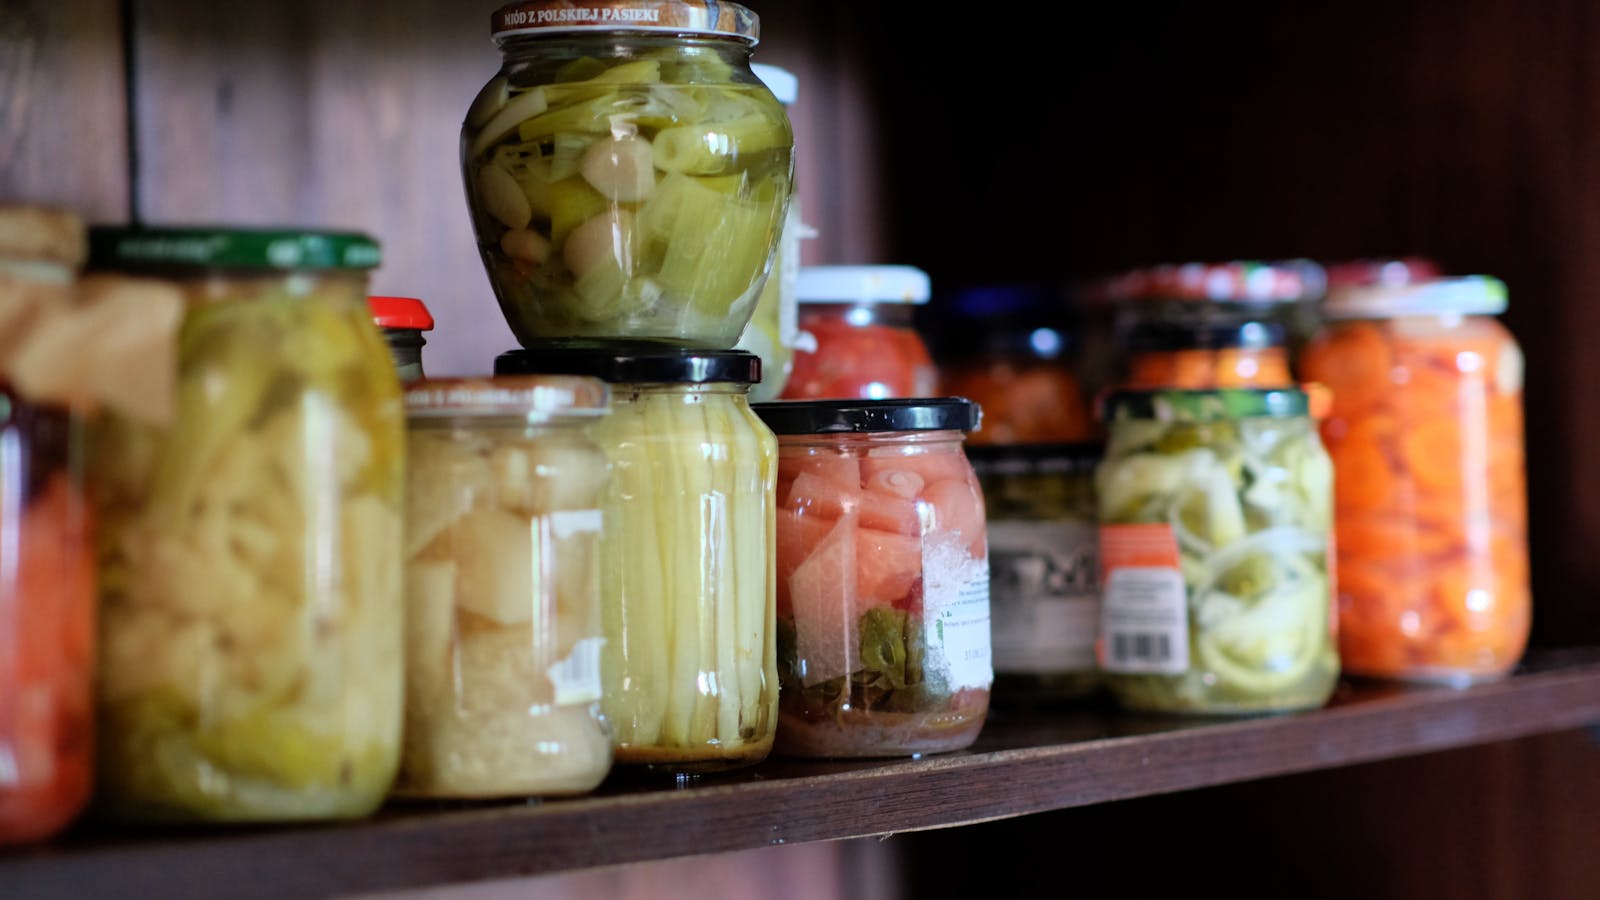
Water Bath and Pressure Canning
Understanding Safe Canning Methods
Let me be completely straight with you about canning: this is the one preservation method where you absolutely cannot wing it. Botulism is real, it’s deadly, and improper canning is how it happens. But don’t let that scare you off—follow tested recipes from USDA, Ball, or Kerr, and you’ll be fine.
Canning Safety Is Non-Negotiable
Improper canning can cause botulism, a potentially fatal foodborne illness. Always follow tested recipes from reliable sources (USDA, Ball, Kerr). Never modify processing times, temperatures, or acid levels in tested recipes. When in doubt, use pressure canning methods or choose alternative preservation techniques. This isn’t me being paranoid—this is me having reviewed too many emergency room reports.
Water bath canning works for high-acid foods:
- What you can safely can: Fruits, tomatoes (with lemon juice added), pickles, jams, jellies
- How it works: Submerge sealed jars in boiling water (212°F) for specified time—the acid creates a hostile environment for bacteria
- Equipment needed: Large stockpot, canning rack, jar lifter, accurate timer—that’s it
- Why it’s easier: No pressure canner needed, lower risk if you follow recipes
Pressure canning is required for low-acid foods:
- What needs pressure: Vegetables, meats, beans, complete meals—basically anything that’s not naturally acidic
- Why pressure matters: You need 240-250°F to kill botulism spores, which means you need pressure beyond normal boiling
- Equipment investment: Real pressure canner (not a pressure cooker—they’re different), about $100-300
- The safety line: Skip this step on low-acid foods and you’re gambling with botulism. Don’t do it.
High-Value Emergency Canning Projects
Pressure-canned vegetables: Green beans:
- Preparation: Wash, trim, cut to jar length
- Packing: Raw pack or hot pack methods
- Processing: 20-25 minutes at 10 pounds pressure (adjust for altitude)
- Emergency value: Familiar vegetable, good nutrition, ready-to-eat
- Storage life: 2-5 years properly stored Carrots:
- Preparation: Peel, cut to uniform pieces
- Packing: Hot pack preferred for better quality
- Processing: 25-30 minutes at 10 pounds pressure
- Nutritional benefit: Beta-carotene, natural sweetness
- Uses: Direct eating, stews, soups Complete meal canning: Soup bases:
- Vegetable soup: Mixed vegetables in seasoned broth
- Chicken soup: Chicken, vegetables, noodles (added when serving)
- Processing: Follow tested recipes for specific ingredients
- Emergency advantage: Complete nutrition, comfort food, heat-and-eat Protein canning: Chicken:
- Preparation: Raw or cooked packing methods
- Processing: 75-100 minutes depending on jar size and method
- Quality result: Tender, fully cooked, ready for multiple uses
- Cost savings: Preserve sale-price chicken for year-round use
Water Bath Canning Projects
Tomato products (with proper acidification): Crushed tomatoes:
- Acidification: 2 tablespoons lemon juice per quart jar
- Processing: 35-45 minutes depending on jar size
- Emergency value: Vitamin C, versatile cooking ingredient
- Storage life: 2-3 years best quality Tomato sauce:
- Preparation: Cook down fresh tomatoes, strain for smooth consistency
- Acidification: Critical for safety, follow tested recipes exactly
- Processing: 35-40 minutes boiling water bath
- Uses: Pizza sauce, pasta sauce, soup base Fruit preservation: Applesauce:
- Preparation: Cook apples until soft, strain or leave chunky
- Natural preservation: No added sugar required for canning safety
- Processing: 15-20 minutes boiling water bath
- Emergency benefit: Familiar comfort food, natural sugars, fiber Fruit in juice:
- Preparation: Pack fruit in own juice or light syrup
- Processing: 20-30 minutes depending on fruit and jar size
- Nutritional advantage: Fresh fruit nutrition preserved
- Variety: Pears, peaches, cherries all can successfully
Canning Equipment and Setup
Essential equipment:
- Pressure canner: 16+ quart capacity for efficiency
- Water bath canner: Large pot with rack and tight-fitting lid
- Canning jars: New lids each use, jars and rings reusable
- Tools: Jar lifter, bubble tool, headspace tool, magnetic lid lifter Space and organization:
- Kitchen setup: Clear counters, organize tools, have clean towels ready
- Safety considerations: Adequate ventilation, stable surfaces, clear work area
- Timing coordination: Plan multiple batches efficiently Quality control:
- Seal testing: Lids should not flex when pressed 24 hours after processing
- Storage conditions: Cool, dark, dry storage for maximum shelf life
- Labeling system: Date, contents, processing method for inventory tracking
Alternative Preservation Methods
Fermentation for Emergency Foods
Lacto-fermentation (natural preservation):
- Process: Beneficial bacteria create acidic environment preventing spoilage
- Safety advantage: Self-preserving process, improves digestibility
- Equipment needed: Glass jars, salt, vegetables
- Storage life: 6-12 months refrigerated, 1-2 years in cool storage Practical fermentation projects: Sauerkraut:
- Ingredients: Cabbage, salt (2% by weight)
- Process: 1-4 weeks fermentation at room temperature
- Emergency value: Vitamin C, probiotics, familiar European comfort food
- Storage: Lasts months in cool conditions without refrigeration Fermented vegetables:
- Carrots: Fermented with salt brine, last 6+ months
- Beets: Natural sugars create excellent fermentation
- Mixed vegetables: Combine favorites for variety
Root Cellaring and Cool Storage
Natural storage methods:
- Temperature requirements: 32-40°F optimal for most root vegetables
- Humidity needs: 85-95% relative humidity prevents drying
- Ventilation: Air circulation prevents CO2 buildup
- Storage containers: Bins, boxes, sand for moisture control Suitable vegetables:
- Potatoes: 3-6 months in proper conditions
- Carrots: 2-4 months in damp sand
- Onions: 3-8 months in dry, ventilated area
- Apples: 2-6 months depending on variety
Smoking and Salt Curing
Hot smoking (cooking and flavoring):
- Temperature: 225-250°F for cooking and preservation
- Time: Varies by food type and thickness
- Wood selection: Fruit woods for mild flavor, hardwoods for stronger
- Safety: Achieve proper internal temperatures for pathogen destruction Cold smoking (advanced technique):
- Temperature: 80-90°F, requires pre-curing
- Salt curing: Essential first step for safety
- Time: Days to weeks depending on product
- Skill requirement: Advanced technique requiring experience
Storage and Organization Systems
Proper Storage Conditions
Environmental requirements:
- Temperature: 50-70°F for most preserved foods
- Humidity: Low humidity prevents mold, too low causes drying
- Light: Dark storage prevents nutrient degradation
- Air circulation: Prevents moisture buildup, maintains quality Container selection:
- Glass jars: Excellent for preserved foods, reusable, pest-proof
- Mylar bags: Light and oxygen barrier for dehydrated foods
- Food-grade buckets: Large quantities, rodent protection
- Vacuum bags: Short-term storage, portion control
Inventory and Rotation Management
Labeling systems:
- Date preserved: Essential for rotation planning
- Processing method: Helps with usage planning
- Expected storage life: Planning for replacement
- Quality notes: Track successes and failures Rotation strategies:
- First in, first out: Use older preserved foods first
- Regular inspection: Monthly checks for quality degradation
- Test consumption: Regular use to verify quality and preferences
- Replacement planning: Preserve new foods before old supplies expire Integration with fresh foods:
- Seasonal preservation: Preserve abundance during peak seasons
- Budget stretching: Use preserved foods during expensive fresh food periods
- Emergency bridging: Preserved foods supplement fresh during disruptions
Cost-Benefit Analysis
Economic Advantages
Initial investment costs:
- Basic dehydrator setup: $200-400
- Pressure canning setup: $150-300
- Water bath canning: $50-100
- Storage containers and supplies: $100-200 Ongoing operational costs:
- Energy usage: Dehydration electricity, canning fuel
- Replacement supplies: Canning lids, storage bags
- Fresh food purchase: Buy seasonal abundance at low prices Cost per serving comparison:
- Home dehydrated fruit: $0.50-1.00 per serving
- Commercial dried fruit: $2.00-4.00 per serving
- Home canned vegetables: $0.75-1.25 per serving
- Commercial canned vegetables: $1.50-3.00 per serving
Time Investment Reality
Learning curve considerations:
- Initial skill development: 20-40 hours learning basic techniques
- Efficiency improvement: Processing time decreases with experience
- Seasonal concentration: Most preservation happens during harvest seasons
- Long-term time savings: Preserved foods reduce daily cooking time Batch processing efficiency:
- Large batches: More efficient than small quantities
- Equipment utilization: Fill dehydrator/canner completely
- Seasonal timing: Process foods at peak ripeness and low cost
- Family involvement: Train multiple family members for efficiency
Emergency Application Strategies
Power Outage Preservation
Immediate preservation needs:
- Refrigerated foods first: Process foods that will spoil quickly
- Solar dehydration: Use sun drying when electricity unavailable
- Smoking methods: Wood fire preservation when power fails
- Salt preservation: Emergency technique requiring no equipment Alternative energy methods:
- Solar dehydrators: Grid-independent preservation capability
- Wood-fired canning: Use wood stove or outdoor fire for processing
- Propane equipment: Gas-powered alternatives to electric methods
Seasonal Emergency Planning
Spring preparation:
- Equipment maintenance: Service dehydrators, check canning supplies
- Planning preservation: Identify seasonal foods to preserve
- Skill refresher: Review techniques before preservation season Summer/fall preservation:
- Peak processing season: Preserve garden abundance and seasonal sales
- Storage preparation: Organize storage areas, check environmental conditions
- Community resources: Coordinate with neighbors for bulk processing Winter emergency readiness:
- Inventory assessment: Count preserved food supplies
- Menu planning: Integrate preserved foods into winter meal plans
- Quality checking: Inspect stored foods for deterioration
Your DIY Preservation Action Plan
Phase 1: Skill Development (Month 1-2)
Start with forgiving methods:
- Basic dehydration: Begin with fruits and simple vegetables
- Water bath canning: Try jam or applesauce for safety margins
- Small batches: Learn techniques without large time/money investment
- Document results: Track what works for your situation and preferences
Phase 2: Equipment Investment (Month 3-4)
Scale up successful methods:
- Purchase quality equipment: Based on successful trial methods
- Organize storage space: Dedicated areas for preserved foods
- Seasonal planning: Identify local seasonal abundance opportunities
- Skill expansion: Add pressure canning or advanced dehydration
Phase 3: Integration and Scaling (Month 5-12)
Build systematic preservation:
- Regular use pattern: Integrate preserved foods into normal meals
- Community connections: Find bulk purchasing or processing opportunities
- Advanced techniques: Fermentation, smoking, specialty preservation
- Emergency integration: Plan preserved foods as emergency supply foundation
Success Factors for DIY Preservation
Quality focus: Better to preserve smaller quantities well than large quantities poorly.
Safety emphasis: Learn proper techniques thoroughly before attempting large-scale preservation.
Family preferences: Preserve foods your family actually enjoys eating.
Seasonal rhythm: Work with natural abundance rather than fighting seasons.
Emergency application: Design preservation program to serve both daily needs and emergency situations.
Home food preservation transforms seasonal abundance into year-round security. When grocery stores close or supply chains fail, families with preservation skills maintain nutritional variety and psychological comfort through familiar, home-preserved foods. The goal isn’t to become completely self-sufficient - it’s to develop preservation skills that enhance both daily nutrition and emergency preparedness while reducing long-term food costs and increasing family food security.
Related Emergency Food Storage Resources
Complete Storage System:
- Emergency Food & Water Storage Guide - Comprehensive layered storage approach
- Long-Term Food Storage Methods - Bulk storage techniques to complement preserved foods
- Winter Storm Grocery List - Emergency shopping for immediate preservation needs
- Water Storage Container Guide - Water storage for preservation and cooking