2-Week Emergency Menu Plan: Shelf-Stable Meals People Will Eat
Create a realistic 14-day emergency menu with no-cook backups, low-fuel meals, a consolidated shopping list, water checks, and household adjustments.
In this guideJump to a section
- Set the planning rules first
- Choose one of three menu modes
- Use this 14-day menu framework
- Build the shopping list by function
- Consolidate the inventory before shopping
- Run the water and fuel audit
- Adjust for real households
- Test one complete day
- 14-Day Menu Planning Card
- Store the menu with the food
- Primary safety sources
A two-week food supply becomes useful only when it can produce two weeks of meals. This plan starts with familiar groceries, reserves the first three days for no-cook or minimal-preparation food, and adds low-fuel meals for the rest of the period.
Start with the food storage calculator for a quantity estimate. Then use the steps below to turn that estimate into a menu that fits your household. For the broader storage system, begin with emergency food storage basics. If you preserve food at home, read the DIY emergency food preservation guide before counting a batch as safe shelf-stable food; for dry bulk staples, use the long-term food storage methods guide instead.
Set the planning rules first
Write down four constraints before choosing meals:
- People: ages, appetites, allergies, medical diets, and foods people reliably accept.
- Utilities: whether refrigeration, electric appliances, tap water, or the normal stove may be unavailable.
- Equipment: manual can opener, pot, utensils, safe outdoor cooking equipment, and a food thermometer where needed.
- Water: drinking water plus the water required by every meal.
FoodSafety.gov recommends at least a three-day supply of foods with a long storage life that require little or no cooking, water, or refrigeration. It also advises accounting for special diets and pets. Expanding that practical baseline to 14 days is more reliable than filling shelves first and inventing meals later.
Choose one of three menu modes
The same pantry can support different utility conditions. Decide the mode before copying a shopping list.
| Mode | Use when | Planning emphasis |
|---|---|---|
| No-cook | Power, fuel, or safe cooking space is uncertain | Ready-to-eat foods, manual opening, minimal dishwashing, safe water |
| Low-fuel | One safe cooking method is available but fuel is limited | One-pot meals, short heating times, soaking where food-safety guidance allows |
| Normal-cook fallback | Normal utilities are currently available but an outage is plausible | Familiar meals with a clearly separated no-cook reserve |
For a power outage, do not count ordinary refrigerated ingredients after their safe window simply because they appear in the meal plan. Use the Power Outage Home Resilience Manual for the refrigerator/freezer checkpoints, then follow current USDA/FDA food-specific guidance.
Build the first three days differently
The first 72 hours deserve a dedicated mini-menu because that is when utility information is incomplete and food-safety decisions are changing.
A useful pattern is:
- Day 1: foods already open or ready-to-eat that do not require heating. Count opened perishable foods only when their type, time, and temperature remain within FoodSafety.gov’s item-specific power-outage guidance.
- Day 2: shelf-stable meals with low cleanup and little water.
- Day 3: repeatable pantry combinations that can continue if the outage extends.
Then duplicate only the meals the household actually ate willingly during a calm-day test.
Use this 14-day menu framework
This is a template, not a prescription. Choose package sizes that fit the number of people eating so an outage does not create unsafe leftovers.
Days 1 to 3: no-cook priority
| Meal | Template | Check before storing |
|---|---|---|
| Breakfast | ready-to-eat cereal, shelf-stable milk, fruit cup | milk size, allergens |
| Lunch | canned beans or fish, crackers, fruit | manual opener, sodium |
| Dinner | ready-to-eat grain pouch, canned vegetables, shelf-stable protein | package can be eaten cold |
| Snack | nut or seed butter, dried fruit, snack bar | choking and allergy risks |
Repeat or swap these combinations with foods your household already uses. If a package says it must be refrigerated after opening, plan to finish it at one meal or choose a smaller package.
Days 4 to 7: add hot-water meals
Use foods that need only a short heating period:
- quick oats with dried fruit
- couscous with canned chickpeas and vegetables
- soup with crackers and shelf-stable fruit
- ready rice with canned beans and salsa
- instant noodles supplemented with lower-sodium protein and vegetables
Record the water required by each package. Water used to cook or rehydrate food comes from the same safe supply needed for drinking and hygiene.
Days 8 to 14: rotate familiar combinations
Create a second week from the same pantry categories:
- Breakfasts: oats, cereal, shelf-stable breakfast bars, or crackers with nut or seed butter
- Lunches: bean salad, fish and crackers, soup, or ready grains with canned vegetables
- Dinners: pasta and sauce, chili, lentil soup, bean and rice bowls, or shelf-stable meal pouches
- Sides and snacks: canned fruit, applesauce, dried fruit, nuts, seeds, or shelf-stable pudding
Repetition is acceptable. A dependable menu with seven breakfasts and seven dinners repeated once is easier to buy, label, and rotate than 42 unrelated recipes.
One seven-day pattern to repeat once
Use this as a replaceable example, not a portion prescription. N means no cooking, H means hot water only, and B means brief outdoor heating with equipment approved for the location and conditions.
| Day | Breakfast | Lunch | Dinner | Preparation check |
|---|---|---|---|---|
| 1 | cereal, shelf-stable milk, fruit | beans, crackers, fruit | ready grain, vegetables, fish or poultry | N; finish opened packages |
| 2 | breakfast bar, seed or nut butter, fruit | fish or bean pouch, crackers, vegetables | shelf-stable meal pouch, fruit | N; verify allergens |
| 3 | cereal, shelf-stable milk, applesauce | bean salad, crackers | ready rice, beans, salsa | N; manual opener ready |
| 4 | quick oats, dried fruit | soup, crackers, fruit | couscous, chickpeas, vegetables | H; total package water |
| 5 | cereal, fruit, seed or nut butter | ready grain and bean bowl | pasta, sauce, shelf-stable protein | B; count fuel and pot water |
| 6 | quick oats, shelf-stable milk | fish or bean salad, crackers | soup, ready grain, vegetables | H or B; avoid leftovers |
| 7 | breakfast bar, fruit, seed or nut butter | beans, crackers, fruit | chili, ready rice, vegetables | N or B; note accepted portions |
Repeat the pattern for days 8 through 14, then make substitutions by function: one shelf-stable protein for another, one ready grain for another, and one fruit or vegetable for another. Keep preparation type, allergens, package size, and water demand the same or better. This prevents a “simple swap” from quietly adding a long cooking session or an unsafe leftover.
Build the shopping list by function
After the menu is complete, total the ingredients into five groups.
Ready-to-eat meals
Stock enough complete no-cook combinations for at least the first three days. A can of beans is an ingredient, not a complete plan, unless the menu identifies what accompanies it and how it will be served.
Staple carbohydrates
Choose quick-cooking grains, crackers, tortillas with an appropriate shelf life, cereal, oats, pasta, or ready-to-eat grain pouches. Compare preparation water and cooking time, not just the amount in the package.
Protein and fats
Options include beans, lentils, canned fish or poultry, nut or seed butter, shelf-stable dairy alternatives, and complete packaged meals. Read labels for allergens, sodium, and serving size.
Fruits and vegetables
Use a mix of canned, dried, or shelf-stable packaged produce that your household eats. Choose can and pouch sizes that minimize leftovers when refrigeration is not available.
Flavor and comfort
Small amounts of familiar condiments, drink mixes, tea, coffee, or comfort foods can make a repetitive menu easier to use. Do not let optional items displace safe water or complete meals.
Consolidate the inventory before shopping
Count menu appearances rather than estimating from shelf space. For each line, multiply the packages used per meal by the number of times that meal appears, then add only a modest replacement margin that the household will rotate.
| Menu item | Packages per meal | Menu appearances | Total packages | Water per package | Total preparation water |
|---|---|---|---|---|---|
| ready grain | label and portion check | count from menu | multiply | label | multiply |
| canned or pouched protein | label and portion check | count from menu | multiply | none or label | multiply |
| quick-cooking staple | recipe check | count from menu | multiply | directions | multiply |
Combine identical ingredients after the math, not before. Keep allergen-safe or medically required food clearly separated and labeled. The result is the shopping list; the calorie estimate remains a rough inventory check rather than an individualized meal prescription.
Run the water and fuel audit
The CDC emergency water baseline is at least one gallon per person per day for three days, with a two-week supply encouraged when possible. Include that baseline and any special household needs in the water plan.
Now total the water printed in your recipes and package directions. If the menu consumes too much of the drinking supply, replace some dry meals with ready-to-eat alternatives.
Next, count cooking sessions. Consolidate compatible foods into one safe outdoor cooking session where practical. Never use camp stoves or charcoal grills indoors; keep them out of garages and away from windows. Follow the exact manual for other openings and site limits. Review off-grid cooking safety before relying on an alternate stove.
Adjust for real households
Children and older adults
Plan familiar textures and package sizes. Include utensils and any feeding supports normally required. Avoid introducing unfamiliar emergency-only food during the event.
Medical and allergy needs
Store a clearly separated supply when cross-contact is a concern. Keep original labels so ingredients, allergens, and preparation directions remain available. Ask a clinician about medical diets rather than using a generic menu unchanged.
For a household that must plan around a diagnosed food allergy, use the food-allergy emergency food plan to build the label, separation, and handoff details alongside this menu. The menu here still handles the 14-day meal and inventory math; it cannot establish whether a particular food is safe for an individual.
Infants
Infant feeding during emergencies requires current health guidance and safe water. Follow the CDC infant-feeding emergency guidance and the product instructions for formula. Do not dilute formula to make it last longer.
Use the infant-feeding emergency planning guide to record the household’s safe-water, refrigeration, cleaning, transport, and clinician questions beside the menu. Keep feeding method and any special instructions specific to the infant’s caregiver and clinician.
Pets
Add pet food, water, a manual opener if cans are used, bowls, medicines, and cleanup supplies. Avoid abruptly changing a pet’s diet if you can rotate the stored food normally.
Test one complete day
Before buying the second week, run a one-day pantry test:
- turn off normal cooking appliances for the exercise
- use only the planned utensils and opening tools
- measure preparation water
- note portions, leftovers, and cleanup water
- ask each person what they would willingly eat again
Correct the plan from the test. A meal that takes too long, creates an unsafe leftover, or is rejected by the household should not be multiplied across 14 days.
Try the can opener you already own with the cans in that menu. If turning or stabilizing it is difficult, use pull-tab cans, pouches, or another opening method the intended user can manage. Our OXO Soft-Handled Can Opener model guide explains the documented design and care limits of one manual option; cushioned handles do not establish that it will work comfortably for everyone.
14-Day Menu Planning Card
Use this as a household planning record, not a nutrition or medical-diet prescription. Fill it from the actual menu, package directions, labels, and the one-day test above.
- Menu mode chosen: no-cook, low-fuel, or normal-cook fallback.
- First three days: complete no-cook combinations are identified.
- Household fit: familiar foods, allergies, medical-diet requirements, infant needs, and package sizes have been checked separately where applicable.
- Opening and serving: manual can opener, utensils, and required feeding supports are available.
- Preparation water: package and recipe water has been totaled separately from the drinking-water baseline.
- Cooking plan: the number of cooking sessions and required fuel are recorded; alternate cooking follows the exact equipment manual and current safety restrictions.
- Inventory math: packages are counted from menu appearances before the shopping list is consolidated.
- Leftovers: foods that require refrigeration after opening are sized to finish safely or replaced.
- One-day test: opening, water, fuel, cleanup, portions, and household acceptance were tested before duplicating the plan.
- Rotation: use-first dates and ordinary-meal rotation are recorded.
Household notes: ____
Preparation-water total: __ Cooking sessions: __
First item to change after the test: ____
Store the menu with the food
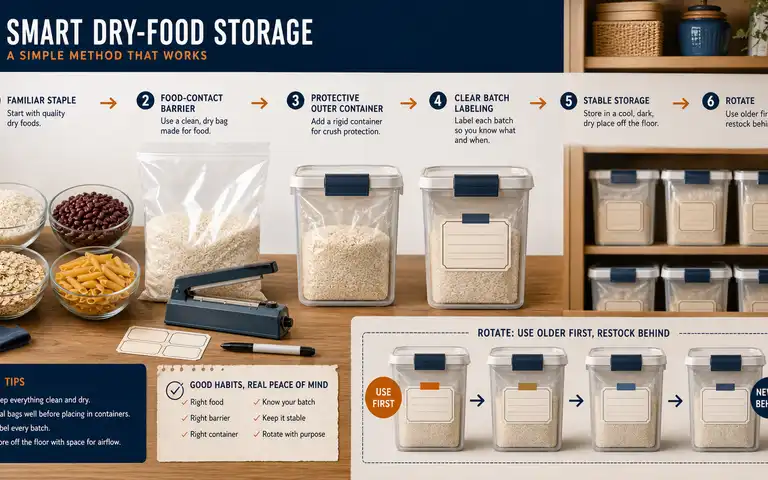
Print the 14-day schedule and place it in a waterproof sleeve near the pantry. On the back, list the water total, cooking method, allergy notes, and substitutions. Arrange foods by use-first date and work them into ordinary meals before package quality declines.
Before buying the second week, print the menu, total the preparation water, and complete the one-day pantry test. Fix the first meal that fails on opening, water, fuel, leftovers, or household acceptance.